
Managing payment information in Google Chrome is designed to streamline the checkout process, but technical hurdles can often disrupt this convenience. Whether you are dealing with forms that refuse to populate, virtual cards that won't activate, or outdated billing details, understanding the underlying mechanics of Chrome's autofill system is essential. By mastering the settings within your Google Account and the browser's local interface, you can ensure your financial data is both accessible and secure. This guide provides a comprehensive walkthrough for troubleshooting common payment issues, including the integration of virtual cards and the management of card-specific benefits.
We will explore how to verify your settings, resolve synchronization errors, and utilize advanced features like 'Buy Now, Pay Later' (BNPL) and Google Wallet integration. Following these steps will help you maintain a reliable digital wallet that works across your devices while protecting your sensitive information. From checking JavaScript permissions to managing on-device site data, this guide covers the technical and practical aspects of maintaining a functional and secure payment environment within the Chrome ecosystem.
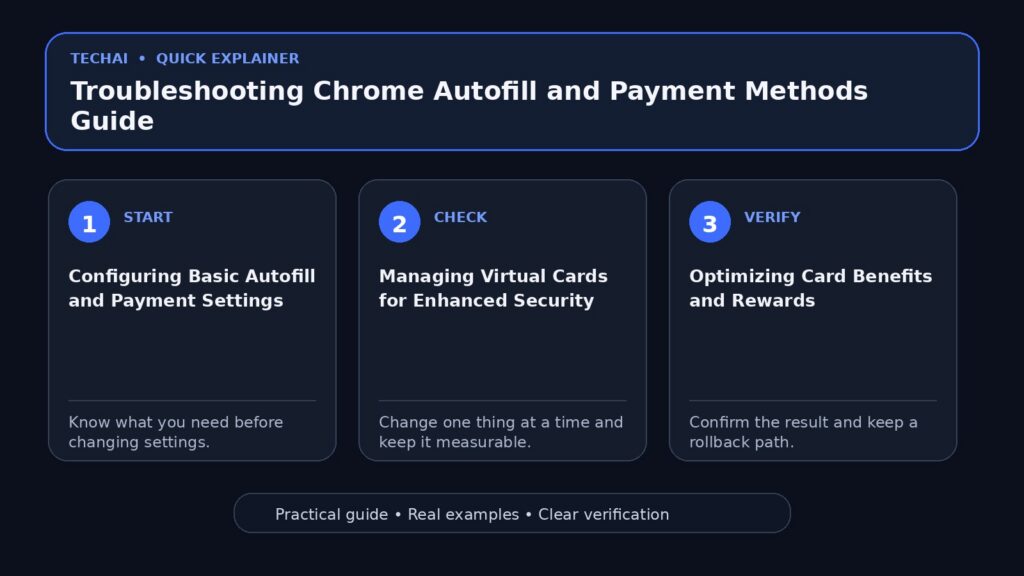
Configuring Basic Autofill and Payment Settings
The foundation of a functional checkout experience in Chrome is the 'Payment methods' menu. To access this, navigate to your Chrome settings and locate the section dedicated to filling out forms automatically. This area allows you to toggle the primary 'Save and fill payment methods' switch, which is the master control for the browser's ability to recognize credit card fields on websites. Without this enabled, Chrome will not prompt you to save new cards or offer to fill existing ones during a transaction.

When this setting is active, Chrome can detect when you enter a new card and offer to save it to your Google Account. It is important to distinguish between cards saved locally on a single device and those synced across your Google Account. For the most consistent experience, ensuring that your Google Account is correctly signed in and synced is the first step in troubleshooting missing information. If you find that your cards appear on your phone but not your desktop, a sync error is the most likely culprit.
Furthermore, you should verify the 'Allow sites to check if you have payment methods saved' setting. This allows merchants to provide a more streamlined handoff to payment gateways. If this is disabled, some modern websites may fail to trigger the autofill prompt entirely. Regularly reviewing your list of saved cards is also recommended to ensure no expired entries or outdated billing addresses are causing conflicts during the verification phase of a purchase.
- Toggle 'Save and fill payment methods' to enable the feature.
- Check that your Google Account sync is active to access cards on multiple devices.
- Verify that 'Allow sites to check if you have payment methods saved' is enabled.
- Review the list of saved cards to ensure no expired entries are causing conflicts.
Managing Virtual Cards for Enhanced Security
Virtual cards provide an additional layer of security by replacing your actual card number with a unique identifier for online transactions. In Chrome, you can manage these through the payment settings. When a card is eligible, Chrome may offer to turn on a virtual card number, which prevents the merchant from seeing your permanent financial details. This is a critical tool for protecting your primary account from potential data breaches at individual retailers.
If you find that virtual cards are not appearing during checkout, it may be due to bank-specific limitations or a disabled setting in your Google Pay profile. Managing these involves checking the 'Virtual card' toggle next to specific cards in your payment list. Not all banks or card issuers currently support this Chrome feature, so if the option is missing, your specific financial institution may not yet be a participant in the program.
To activate a virtual card, you typically need to undergo a verification process with your bank, often involving a one-time passcode sent via SMS or email. Once verified, Chrome will store the virtual token. During checkout, instead of your real 16-digit number, Chrome will populate the field with the virtual number. This ensures that even if the merchant's database is compromised, your actual credit card remains secure and does not need to be cancelled and replaced.
- Look for the 'Virtual card' label next to eligible cards in your settings.
- Enable virtual cards to hide your actual card number from merchants.
- Use virtual cards in apps and on websites where security is a primary concern.
- Note that not all banks or card issuers currently support this Chrome feature.
Optimizing Card Benefits and Rewards
Chrome has introduced the ability to manage card benefits directly within the autofill interface. This feature allows the browser to highlight which of your saved cards offers the best rewards or cashback for a specific purchase. If these suggestions are not appearing, you may need to verify that 'Card benefits' is enabled in your autofill settings. This tool is designed to help you make informed financial decisions at the point of sale without needing to memorize various reward structures.
By keeping your card information updated, Chrome can accurately pull benefit data from participating issuers to show you the most relevant perks during the checkout process. For example, if one card offers 5% back on travel and another offers 3% on dining, Chrome can surface this information when it detects the merchant category. This integration reduces the cognitive load of managing multiple rewards programs manually.
To ensure this feature works correctly, your cards must be saved to your Google Account rather than just locally on the device. Chrome uses the card's BIN (Bank Identification Number) to identify the specific product and its associated benefits. If your card is recently issued or a niche product, the benefit data might not be available immediately. Regularly checking for updates to your card list in the 'Payment methods' section ensures you are getting the most accurate reward suggestions.
- Enable 'Card benefits' in settings to see rewards during checkout.
- Ensure your card details are accurate to receive the correct benefit suggestions.
- Check for benefit icons or text overlays in the payment dropdown menu.
- Update your cards regularly as issuers change their reward programs.
Troubleshooting Form Filling Failures
Sometimes Chrome fails to recognize a form as a payment field, or the autofill popup simply does not appear. This can be caused by several factors, including site-specific coding, browser extensions that interfere with JavaScript, or restrictive ad blockers. If a site's required parts fail to load, it often prevents the autofill mechanism from triggering. JavaScript is particularly essential; if it is disabled, the scripts that identify form fields and communicate with Chrome's autofill engine will not run.

To resolve this, first try disabling any active ad blockers or security extensions that might be modifying the page's code. Some extensions are designed to prevent 'fingerprinting' or tracking, but they can inadvertently block the legitimate scripts used for payment processing. Additionally, ensure that JavaScript is enabled in your Chrome site settings. If the issue persists, testing the site in Incognito mode can help identify if a local extension or a corrupted cache is the culprit.
Another common issue is the use of non-standard payment forms. Some websites use custom-built checkout flows that do not use standard HTML tags for credit card numbers or expiration dates. In these cases, Chrome's heuristic engine may not recognize the fields. While you cannot fix the website's code, you can sometimes trigger autofill by right-clicking the field and selecting 'Autofill' from the context menu, or by clearing your 'Autofill form data' from your browsing history to reset the browser's detection logic.
- Verify that JavaScript is enabled in Chrome's site settings.
- Disable ad blockers or extensions that might interfere with form detection.
- Check if the site is using a non-standard payment form that Chrome cannot read.
- Try clearing 'Autofill form data' from your browsing history to reset the system.
Integrating Google Wallet and Payment Info
Your payment information in Chrome is often tied directly to your Google Wallet. Managing your info in Google Wallet ensures that changes made there—such as updating a billing address or adding a new card—reflect immediately in Chrome. This synchronization is vital for users who frequently switch between mobile apps and desktop browsing. When you add a card to Google Wallet on an Android device, it should automatically appear as an option in Chrome on your desktop, provided you are signed into the same account.
If you encounter a discrepancy between what you see in your Wallet and what appears in Chrome, it usually indicates a sync delay or a login issue. Re-authenticating your Google Account within the browser can often force a refresh of the payment data. This integration also supports 'Buy Now, Pay Later' (BNPL) options. Chrome can now surface BNPL providers during checkout, allowing you to manage these installment plans through the same interface as your standard credit cards.
Security for these integrated services is managed through your Google Account PIN or device-level authentication. If you are prompted for a PIN that you do not remember, you may need to reset it through the Google Account security settings. Ensuring your Google Wallet is up to date is the most efficient way to manage payment methods globally across all Google services, including YouTube, Google Play, and Chrome autofill.
- Update billing addresses in Google Wallet for global accuracy.
- Use the Google Wallet interface to add or remove cards for all Google services.
- Check for 'Buy Now, Pay Later' options within the Chrome autofill menu.
- Ensure your Google Account PIN is set up for secure access to Wallet data.
Privacy and Security of Autofill Data
Chrome employs several layers of protection to keep your autofill and password data safe. This includes encryption and the option to require authentication (like a biometric scan or device passcode) before filling in sensitive card details. Understanding these security measures can help you troubleshoot why you might be prompted for a password more frequently than expected. For instance, if you have 'Screen lock' enabled for payments, Chrome will require your Windows Hello, Touch ID, or Android biometric before it will populate a CVC code.
If you find the security prompts intrusive, you can adjust the frequency in the 'Privacy and security' section of Chrome settings. However, maintaining these prompts is highly recommended to prevent unauthorized users of your device from accessing your financial information. Chrome also provides a 'Safety Check' tool that can scan your saved passwords and payment methods to see if they have been compromised in known third-party data breaches.
Furthermore, Chrome allows you to manage on-device site data. This gives you control over what information is stored locally on your machine versus what is stored in the cloud. If you are using a shared computer, it is best to use Guest mode or Incognito mode, as these sessions do not save payment information or autofill data once the window is closed. For personal devices, keeping 'Safe Browsing' active ensures that Chrome can warn you if you are entering payment details on a known phishing site.
- Enable 'Screen lock' for an extra layer of security before autofilling cards.
- Use the 'Safety Check' feature to scan for compromised data.
- Review 'Privacy in Chrome' settings to understand how your data is handled.
- Manage on-device site data to control what information is stored locally.
Resolving Connection and Loading Errors
Payment issues are not always related to the data itself; sometimes, network issues prevent Chrome from communicating with Google's servers to verify a card or retrieve a virtual number. If you receive connection or loading errors during checkout, check your internet stability and ensure that Chrome is updated to the latest version. Outdated browsers may lack the security protocols required by modern payment processors, leading to failed handshakes between the browser and the bank.
In cases where a specific site refuses to load the payment module, it may be due to the site's own security settings or a conflict with Chrome's Safe Browsing feature. While Safe Browsing protects you from malicious sites, occasionally it may flag a legitimate payment gateway if its certificates are misconfigured. Checking the site's connection security via the padlock icon in the address bar can provide clues; if the connection is not secure (HTTP instead of HTTPS), Chrome may block autofill to protect your data.
If persistent errors occur across all sites, you may need to reset Chrome settings to their original defaults. This action will disable all extensions and clear temporary data that might be causing a conflict. Before doing this, ensure you have backed up any important local data. A clean slate often resolves deep-seated configuration issues that prevent the autofill system from communicating with the Google Pay backend.
- Update Chrome to the latest version to ensure compatibility.
- Check the padlock icon in the address bar for security warnings.
- Restart your router or switch networks if you see 'Connection Error'.
- Reset Chrome settings to default if persistent errors occur across all sites.
Key takeaways
- Enable 'Save and fill payment methods' in Chrome settings to activate the autofill feature.
- Use virtual cards to mask your actual credit card number for more secure online shopping.
- Sync your Google Account to ensure payment methods are available across all your devices.
- Check JavaScript and extension settings if payment forms fail to load or populate.
- Manage card benefits in settings to see rewards and cashback offers during checkout.
Common mistakes to avoid
- Forgetting to update the billing address in Google Wallet after moving, leading to declined transactions.
- Disabling JavaScript, which prevents many payment forms and autofill triggers from functioning.
- Assuming all cards are automatically virtual; you must manually enable virtual card numbers for eligible cards.
- Ignoring browser updates, which can lead to security mismatches with modern payment gateways.
Useful TechAI links
FAQ
Why won't Chrome ask to save my new credit card?
This usually happens if the 'Save and fill payment methods' setting is turned off or if you are browsing in Incognito mode. Ensure you are signed into your Google Account and that the setting is enabled in the 'Payment methods' section of Chrome settings.
How do I stop Chrome from asking for my CVC every time?
For security, Chrome often requires the CVC. However, you can reduce these prompts by enabling 'Screen lock' for payment filling in your settings, which uses your device's biometric or passcode authentication instead of the manual CVC entry.
What should I do if my virtual card is declined?
First, verify that the underlying physical card is active and has sufficient funds. If the issue persists, try removing and re-adding the virtual card in your Google Pay or Chrome payment settings, as the virtual token may have expired or been flagged by your bank.
Can I use Chrome autofill for 'Buy Now, Pay Later' services?
Yes, Chrome supports certain 'Buy Now, Pay Later' providers. You can manage these options within the same payment settings menu where you manage your standard credit and debit cards, allowing for installment-based checkouts on supported sites.