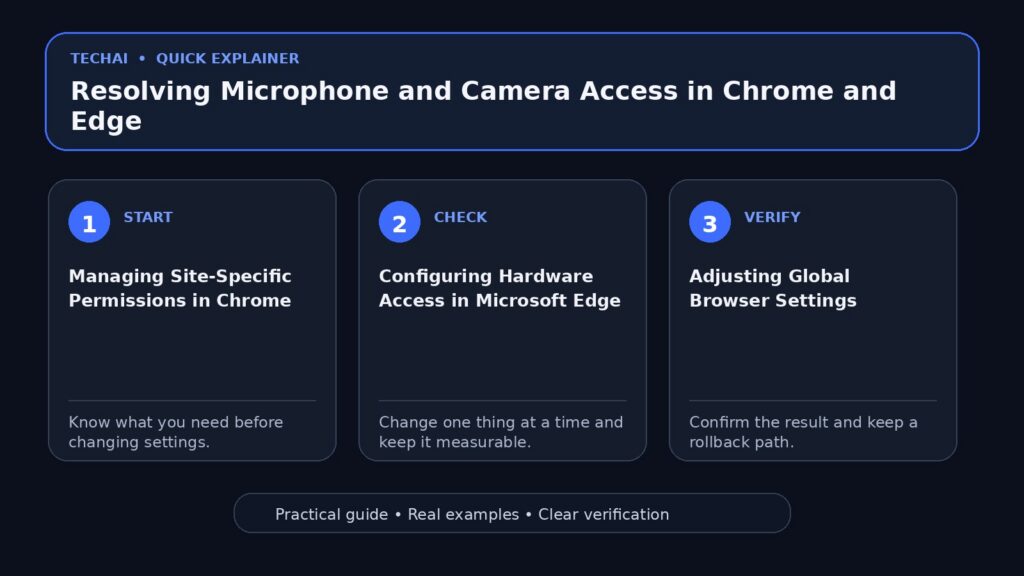
Modern web applications for video conferencing and communication rely heavily on seamless access to your computer's hardware. However, security protocols in Google Chrome and Microsoft Edge often block these peripherals by default or through accidental user denial. When a website cannot access your camera or microphone, it is usually due to a mismatch between the browser's global settings and the specific permissions granted to that individual site. Understanding how to navigate these permission layers is essential for maintaining a functional digital workspace.
This guide provides a technical walkthrough for auditing and correcting hardware access issues based on official browser documentation. We will explore how to reset site-specific permissions, adjust global browser behavior, and verify that the underlying operating system isn't creating a bottleneck. By following these structured troubleshooting steps, you can resolve most 'hardware not found' or 'access denied' errors without needing to reinstall your browser or restart your entire system.
Managing Site-Specific Permissions in Chrome
Google Chrome uses a granular permission model that allows you to control hardware access on a per-site basis. When you visit a site that requires the camera or microphone, Chrome typically displays a prompt near the address bar. If you previously clicked 'Block,' the site will remain restricted until you manually update the settings. This is the most common cause of hardware failure in web apps, as the browser remembers your choice indefinitely to protect your privacy.
To fix this, you can interact directly with the site identity icon—the lock or settings icon—located to the left of the URL. This menu provides immediate access to the toggles for the camera and microphone. If the toggles are not visible, you can dive deeper into the 'Site settings' menu to view every permission currently associated with that specific domain. This allows you to see if other factors, like location or notifications, are also being restricted.
In cases where the site still fails to recognize the hardware after toggling the switches, the 'Reset permission' button within the Site Settings menu is a powerful tool. This clears all custom settings for that specific URL, forcing the browser to treat the site as if it were your first visit. This will trigger the permission prompt again, allowing you to select 'Allow' and re-establish the connection between the web app and your hardware.
- Click the icon to the left of the web address.
- Toggle the 'Camera' or 'Microphone' switches to the 'On' position.
- Select 'Site settings' for a comprehensive list of all allowed and blocked features.
- Use the 'Reset permission' button if the site continues to behave unexpectedly.
Configuring Hardware Access in Microsoft Edge
Microsoft Edge, built on the Chromium engine, shares a similar architecture with Chrome but features a distinct interface for managing privacy. Edge allows users to set a default behavior—such as 'Ask before accessing'—which ensures that no site can use your hardware without an explicit interaction. If a site is malfunctioning, it may have been added to a 'Block' list within the Edge settings hierarchy, often without the user realizing it during a hurried browsing session.
Navigating to the 'Cookies and site permissions' section in Edge settings allows you to manage these lists with precision. Here, you can see which sites are explicitly allowed and which are blocked. Removing a site from the 'Block' list will force Edge to ask for permission again the next time the site attempts to use your camera or microphone. This is particularly useful for enterprise users who may have complex permission sets across multiple work-related domains.
Edge also provides a 'Recent activity' view within the permissions menu. This allows you to see exactly when a site last requested access to your microphone or camera. If you see a request that was automatically blocked, it is a clear indicator that the global 'Ask before accessing' toggle might be disabled or that the site is on a restricted list. Adjusting these settings ensures that your hardware is available when needed for Microsoft Teams or other web-based communication tools.
- Open Edge Settings and navigate to 'Cookies and site permissions'.
- Select 'All sites' to search for a specific URL's current status.
- Check the 'Camera' and 'Microphone' sections to see the 'Block' and 'Allow' lists.
- Ensure 'Ask before accessing' is toggled on for the most secure and flexible experience.
Adjusting Global Browser Settings
Beyond individual site permissions, both Chrome and Edge have global settings that can disable hardware access across the entire browser. If you find that no websites can access your camera, the global master switch may have been turned off. This often happens after a browser update or a security software scan that tightens privacy settings to a maximum-security state, which can inadvertently break web app functionality.
In Chrome, these are found under 'Privacy and security' > 'Site Settings'. In Edge, they are under 'Cookies and site permissions'. You must ensure that the default behavior is set to 'Sites can ask to use your camera/microphone'. If 'Don't allow sites to use your camera/microphone' is selected, all site-level overrides will be ignored, and the browser will not even prompt you for permission when a site requests it.
Additionally, these global menus are where you select the default hardware device. If you have multiple cameras or microphones, the browser might be defaulting to a device that is currently disabled or physically covered. By selecting the correct device from the dropdown menu in these settings, you ensure that the browser is sending the correct hardware signal to the website. This is a critical step for users with external USB peripherals.
- Verify the 'Default behavior' is not set to a universal block.
- Check for multiple cameras or microphones in the dropdown menu.
- Look for 'Managed by your organization' messages indicating IT-level restrictions.
- Update your browser to the latest version to ensure driver compatibility.
Troubleshooting JavaScript and Extension Interference
Hardware access in the browser is facilitated by JavaScript APIs. If JavaScript is disabled, or if a browser extension is interfering with the site's scripts, the request for camera access may never trigger. Ad blockers and privacy-focused extensions are frequent culprits, as they may perceive the hardware request as a tracking attempt or a security risk, leading them to silently kill the script before it can run.

To diagnose this, try accessing the site in an Incognito or InPrivate window. These modes typically disable extensions by default. If the camera works in private mode, you know an extension is the cause. You can then re-enable your extensions one by one to identify the specific software causing the conflict. This method is much faster than manually checking every setting within each individual extension.
Furthermore, ensure that JavaScript is enabled in your browser's content settings. Many modern communication tools cannot function without it, as the code required to bridge the gap between the web interface and your local hardware relies on active scripting. If you see a message stating 'JavaScript is disabled,' you must enable it in the 'Site settings' or 'Content' section of your browser to proceed with hardware initialization.
- Disable ad blockers or privacy extensions temporarily to test functionality.
- Check if JavaScript is allowed for the specific site in 'Site settings'.
- Test the site in an Incognito (Chrome) or InPrivate (Edge) window.
- Clear the browser cache to remove corrupted script files.
Verifying Operating System Permissions
Even if your browser settings are perfect, the underlying operating system (Windows or macOS) has its own privacy layer. Modern OS versions require you to grant the browser application itself permission to use the microphone and camera. If the OS-level permission is revoked, the browser will report that no hardware is available, even if it is plugged in and functional. This is a common issue after major OS updates.
On Windows, this is managed in the 'Privacy & security' section of the Settings app. You must ensure that 'Allow apps to access your camera' is toggled on, and specifically that your browser (Chrome or Edge) is permitted in the list of desktop apps. If the browser is missing from this list, it may need to be restarted or re-registered with the system by visiting a site that triggers a fresh hardware request.
On macOS, similar settings are found under 'Security & Privacy' in the System Preferences menu. You must check the 'Camera' and 'Microphone' tabs to ensure the browser has a checkmark next to it. If the OS blocks the browser, no amount of changing internal browser settings will fix the issue, as the hardware signal is being stopped at the system kernel level before it ever reaches the application.
- Open Windows Settings > Privacy & security > Camera/Microphone.
- Ensure 'Camera access' and 'Let apps access your camera' are enabled.
- Verify the specific browser is toggled 'On' in the desktop app list.
- Restart the browser after changing OS-level privacy settings.
Handling Multiple Hardware Inputs
Users with multiple audio or video devices—such as a laptop with a built-in webcam and an external USB camera—often encounter issues where the browser defaults to the wrong device. If the browser is trying to use a disconnected or covered internal camera instead of your external one, it may appear as though the hardware is broken. This is frequently seen in home office setups with docking stations.
Both Chrome and Edge allow you to select the specific hardware source from a dropdown menu within the site settings or the global privacy settings. Always verify that the selected device matches the one you intend to use. If a device doesn't appear in the list, it may not be properly recognized by the operating system's drivers, or it may be disabled in the Windows Device Manager.
Another common conflict occurs when another application, such as Zoom, Skype, or Microsoft Teams, is already using the camera. Most webcams can only be accessed by one application at a time. If a background app has a 'lock' on the hardware, the browser will show a black screen or an 'Access Denied' error. Closing all other media-heavy applications is a necessary step in troubleshooting hardware availability.
- Check the 'Camera' or 'Microphone' dropdown in browser settings.
- Unplug and replug USB devices to refresh the hardware list.
- Ensure the device is not being used by another application simultaneously.
- Verify the device is enabled in the Windows Device Manager.
Resetting Browser Settings to Default
If you have exhausted all specific permission checks and the hardware still fails to initialize, a full reset of the browser settings may be necessary. This action reverts all startup pages, new tab pages, search engines, and pinned tabs to their original state. Crucially, it also clears temporary data like cookies and resets all site permissions to the factory defaults, which can resolve deep-seated configuration errors.
While this is a drastic step, it is highly effective at clearing conflicts that are difficult to find manually, such as corrupted site data or hidden flags that might be interfering with the MediaStream API. Note that resetting your settings will not delete your bookmarks, history, or saved passwords, but it will disable all extensions until you manually re-enable them, providing a clean slate for hardware testing.
After performing a reset, it is vital to restart the browser immediately. Upon reopening, navigate directly to the site requiring the camera or microphone. You should see a fresh permission prompt. By accepting this prompt on a clean browser profile, you can confirm whether the previous issues were caused by a specific setting or a more fundamental problem with the browser installation itself.
- In Chrome: Settings > Reset settings > Restore settings to defaults.
- In Edge: Settings > Reset settings > Restore settings to default values.
- Confirm the reset and restart the browser immediately.
- Re-test the camera/microphone on a trusted site like a meeting app.
Key takeaways
- Site-specific permissions override global browser settings and are the most common point of failure.
- Operating system privacy toggles can block the browser from seeing hardware entirely.
- Extensions and ad blockers can interfere with the JavaScript required to trigger hardware prompts.
- Always verify that the correct device is selected in the browser's hardware dropdown menu.
- Using Incognito or InPrivate mode is an effective way to rule out extension-related conflicts.
Common mistakes to avoid
- Assuming the hardware is broken before checking the browser's 'Block' list.
- Forgetting to check if another application is already using the camera in the background.
- Ignoring the 'Lock' icon in the address bar, which provides the fastest way to fix permissions.
- Disabling JavaScript globally, which prevents hardware permission prompts from appearing.
Useful TechAI links
FAQ
Why does my camera work in other apps but not in Chrome or Edge?
This usually indicates that the browser has been denied permission at the OS level or within the browser's own site settings. Check the 'Privacy & security' settings in your operating system to ensure the browser is allowed to access the camera.
What should I do if the 'Allow' prompt never appears?
Check if you have previously blocked the site by clicking the lock icon in the address bar. Also, ensure JavaScript is enabled and try disabling any active ad blockers that might be suppressing the pop-up.
Can I set different microphones for different websites?
While you can set a global default, you can also change the device for a specific session via the site settings. However, the browser generally remembers the last device used globally unless manually changed.
Why is my microphone volume too low in the browser?
Chrome and Edge have internal volume sliders for some inputs, but you should primarily check the 'Sound' settings in your OS. Ensure the input gain is set correctly in the system control panel.